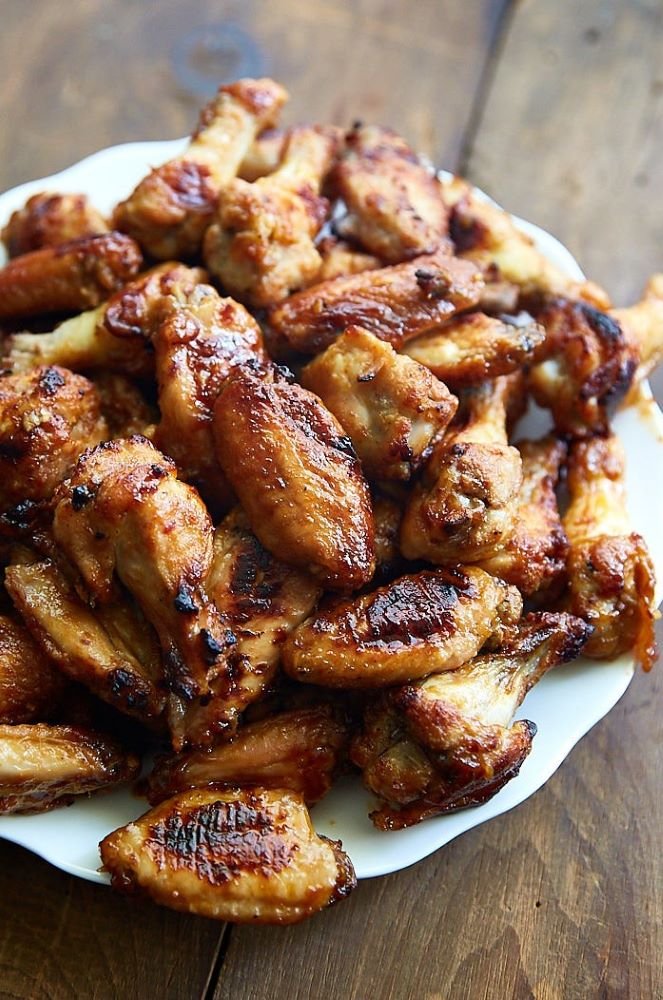
I’ve cooked wings for restaurant Sunday rushes and for lazy weeknights at home, and I’ll tell you the same thing I tell everyone who swears you need a deep fryer: you don’t. These crispy baked BBQ wings come out shatteringly crisp on the outside, juicy inside, and coated in a sticky, glossy BBQ glaze that clings to every ridge — no oil splatter, no mess, no guilt. The oven does the hard part while you do nothing.
This is the exact method I’ve leaned on for years, refined down to the two or three details that actually matter. Get those right and your wings will beat most takeout. Skip them and you’ll end up with the sad, soggy wings that gave “baked wings” a bad name in the first place.
How to Make Crispy Baked BBQ Wings
Pat the wings completely dry, toss them with aluminum-free baking powder and salt, and arrange them on a wire rack. Bake at a low 250°F (120°C) for 30 minutes to render the fat, then crank the heat to 425°F (220°C) for 40–45 minutes until deeply golden and crispy. Toss the hot wings in warmed BBQ sauce and broil for 2 minutes to set that sticky glaze. Total time: about 1 hour 20 minutes, mostly hands-off.
That two-temperature trick is the whole secret. Read on for why it works and how to nail it.
Why This Recipe Works
Three things separate genuinely crispy baked wings from rubbery ones:
Dry skin. Moisture is the enemy of crisp. Wet skin steams instead of crisping, so we pat the wings bone-dry before anything touches them.
Baking powder, not baking soda. A light coat of aluminum-free baking powder raises the skin’s surface pH, which helps it brown and blister. It draws moisture out and breaks down the proteins so the skin crackles like fried. Use baking powder, never baking soda — baking soda in that quantity tastes metallic and soapy.
The low-then-high bake. Starting low renders the thick layer of fat under the skin gently, so when the heat spikes there’s nothing left to keep the skin soft. The result is a crust that genuinely crunches.
Ingredients
Makes about 4 servings (roughly 2 lbs / 900g of wings)
For the wings:
- 2 lbs (900g) chicken wings, split into drumettes and flats, tips removed
- 1 tablespoon aluminum-free baking powder
- 1 teaspoon fine sea salt
- ½ teaspoon garlic powder
- ½ teaspoon smoked paprika
- ¼ teaspoon black pepper
For the sticky BBQ glaze:
- ¾ cup (180ml) good-quality BBQ sauce (your favorite — see notes below)
- 1 tablespoon honey
- 1 tablespoon unsalted butter
- 1 teaspoon apple cider vinegar
- ½ teaspoon hot sauce (optional, for a little kick)
Equipment You’ll Need
- A rimmed baking sheet
- A wire cooling rack that fits inside it (this is non-negotiable — it lets hot air circulate under the wings so they crisp on all sides)
- Aluminum foil for easy cleanup
- A small saucepan for the glaze
If you don’t own a wire rack, you can bake directly on a foil-lined sheet, but flip the wings halfway and accept that the bottoms won’t be quite as crisp.
Step-by-Step Instructions
1. Dry the wings thoroughly. Pat every piece with paper towels until the skin feels dry to the touch. If you have time, leave them uncovered in the fridge for an hour (or overnight) — dehydrated skin crisps even harder. This is the single biggest upgrade you can make.
2. Season. In a large bowl, whisk together the baking powder, salt, garlic powder, smoked paprika, and black pepper. Add the wings and toss until each piece is evenly, lightly coated. You want a thin dusting, not clumps.
3. Arrange. Line your baking sheet with foil, set the wire rack on top, and lay the wings out in a single layer with space between each one. Crowding traps steam — give them room to breathe.
4. Bake low. Place the wings in a cold oven (or one set to 250°F / 120°C) and bake for 30 minutes. The fat under the skin slowly renders here. The wings won’t look like much yet — that’s normal.
5. Bake high. Raise the temperature to 425°F (220°C) and bake for another 40–45 minutes, rotating the tray once, until the wings are deeply golden, blistered, and crisp. Don’t pull them early; that last 10 minutes is where the magic happens.
6. Make the glaze. While the wings finish, warm the BBQ sauce, honey, butter, vinegar, and hot sauce in a small saucepan over low heat. Stir until the butter melts and it’s glossy and pourable, about 3 minutes. Warming the sauce thins it just enough to coat without making the wings soggy.
7. Toss and glaze. Transfer the hot, crispy wings to a clean bowl. Pour over about two-thirds of the warm glaze and toss until every piece is coated. Save the rest for dipping.
8. Broil for that sticky finish. Return the glazed wings to the rack and broil on high for 1–2 minutes, watching closely. The sugars caramelize and the sauce turns tacky and lacquered — that signature sticky shine. Don’t walk away; BBQ sauce burns fast.
Rest for 2 minutes, then serve hot.
Pro Chef Tips for the Crispiest Wings
- Fresh beats frozen. If using frozen wings, thaw them completely and pat them extra dry — frozen wings carry a lot of surface water.
- Don’t skip the fridge dry. Even 30 uncovered minutes in the fridge makes a noticeable difference in crunch.
- Salt before the baking powder, lightly. Over-salting the dry rub plus a salty BBQ sauce can push things too far. Taste your sauce first.
- Glaze at the very end. Sauce applied too early during baking will burn and soften the skin. Heat, then crisp, then glaze.
- Want extra sticky? Add a second thin layer of glaze right after broiling while the wings are still blazing hot.
Common Mistakes to Avoid
The wings come out soggy when the skin was wet going in, the tray was overcrowded, or the oven wasn’t hot enough at the end. They come out bland when they were under-seasoned before baking — season the wings, not just the sauce. And they come out bitter when the BBQ glaze burned under the broiler, so keep that final step to a couple of watchful minutes.
How to Serve
These wings shine with cool, creamy contrasts: a ranch or blue cheese dip, crunchy celery and carrot sticks, or a sharp slaw to cut the sweetness. For a full spread, pair them with cornbread, baked beans, or loaded fries. They’re a guaranteed crowd-pleaser for game day, parties, or a Friday night in.
Storage and Reheating
Store leftover wings in an airtight container in the fridge for up to 3 days. To bring back the crisp, reheat in a 400°F (200°C) oven or air fryer for 6–8 minutes — never the microwave, which turns them rubbery. You can freeze fully cooked, unsauced wings for up to 2 months; reheat from frozen and glaze fresh.
Can You Make These in an Air Fryer?
Yes. Air-fry the dry-rubbed wings at 380°F (190°C) for 12 minutes, flip, then crank to 400°F (200°C) for another 8–10 minutes until crisp. Toss in warm glaze and air-fry 2 more minutes to set. Same principles, faster cook — just don’t overcrowd the basket.
Frequently Asked Questions
Why aren’t my baked wings crispy? Almost always one of three reasons: the skin was still damp before baking, the wings were crowded on the tray, or the oven temperature was too low at the finish. Dry the wings well, give them space, and finish hot at 425°F.
Can I use baking soda instead of baking powder? No. Baking soda in this amount leaves a metallic, soapy taste. You need aluminum-free baking powder, which has a much milder flavor and is what crisps the skin.
How long do you bake chicken wings at 425°F? After the initial low-temperature render, about 40–45 minutes at 425°F (220°C), rotating once, until deeply golden and crisp.
What’s the best BBQ sauce for sticky wings? A thicker, tomato-and-molasses-based sauce clings best. Sweeter sauces caramelize beautifully under the broiler; for balance, a splash of vinegar and a little honey rounds it out. Use whatever brand you genuinely love — the recipe lets it shine.
Should I leave the skin on? Absolutely. The skin is where all the crispness lives. Skinless wings will never get that crunch.
Are baked wings healthier than fried? They use a fraction of the oil since the fat renders out during baking, so they’re lighter than deep-fried wings while staying just as crisp.
Recipe note: For best results, weigh your wings and adjust the baking powder proportionally — about 1½ teaspoons per pound. Trust the two-temperature method; it’s the difference between good wings and great ones.